|
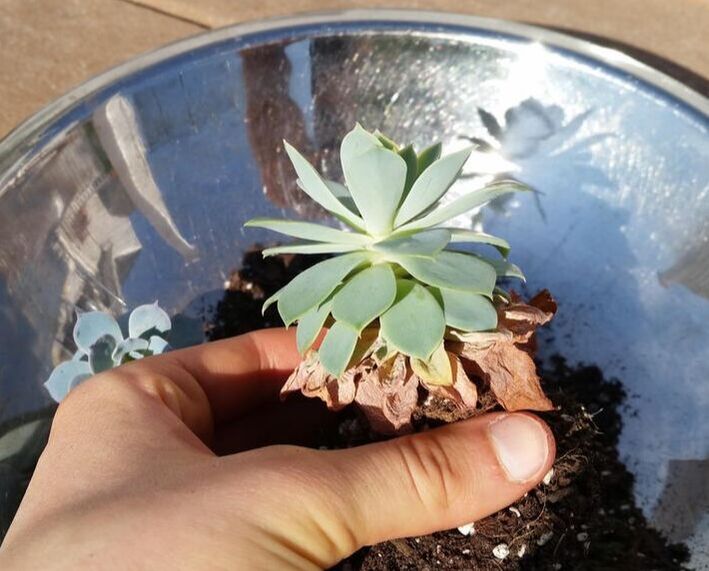
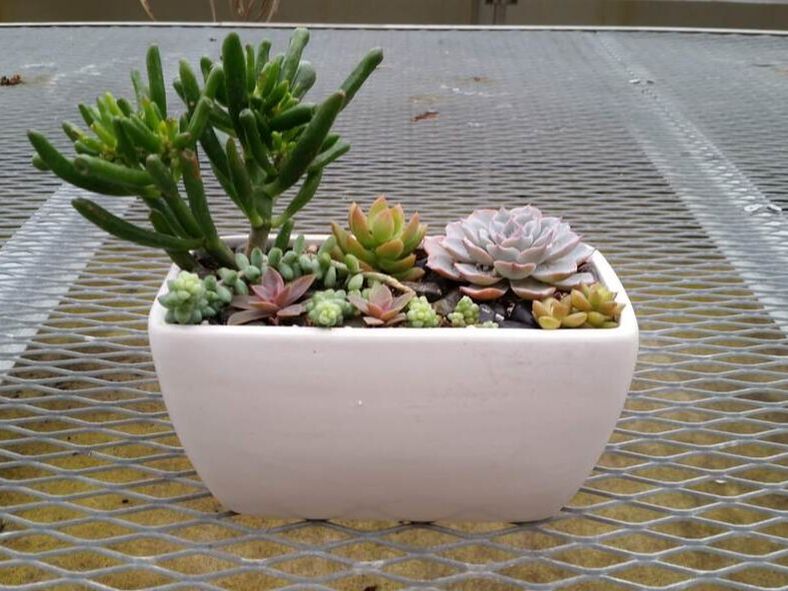
It's natural for succulents, particularly ones in arrangements, to get a little wild after a few months. Some of this just has to do with the fact that they're growing. But, after a dark Michigan winter, your plants have probably stretched and lost some of their colors, and they may not be looking very beautiful anymore. The good news is, there is a solution! With a little bit of work and some days in the summer sun, your arrangement should look good as new! 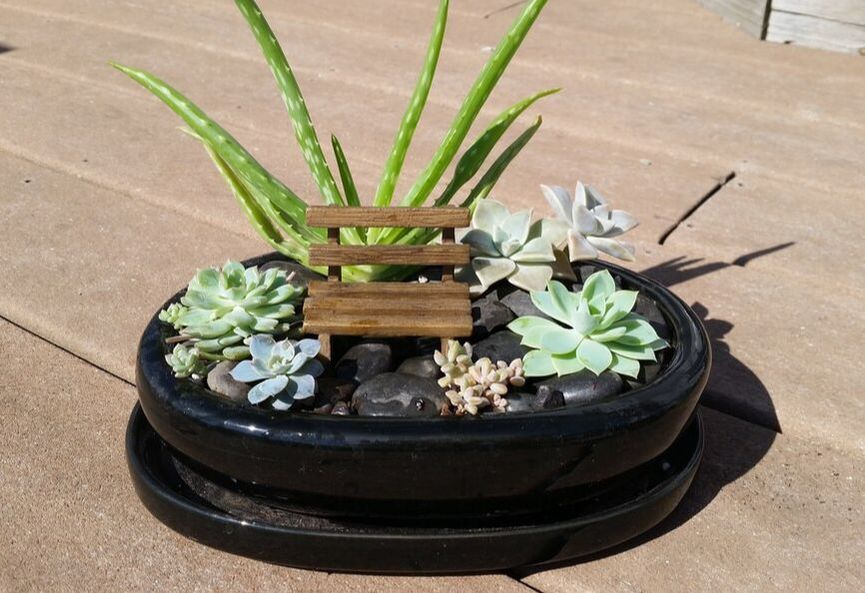 If you've never pruned an arrangement before, that's fine! It's pretty easy to learn, and rewarding to see your arrangement go from crazy to beautiful again. To prune your arrangement, you'll need a big bowl, a smaller bowl or plate, and a pair of scissors. Before you start, take a "before" picture so that you can see the change. Here's one of my arrangements before pruning: 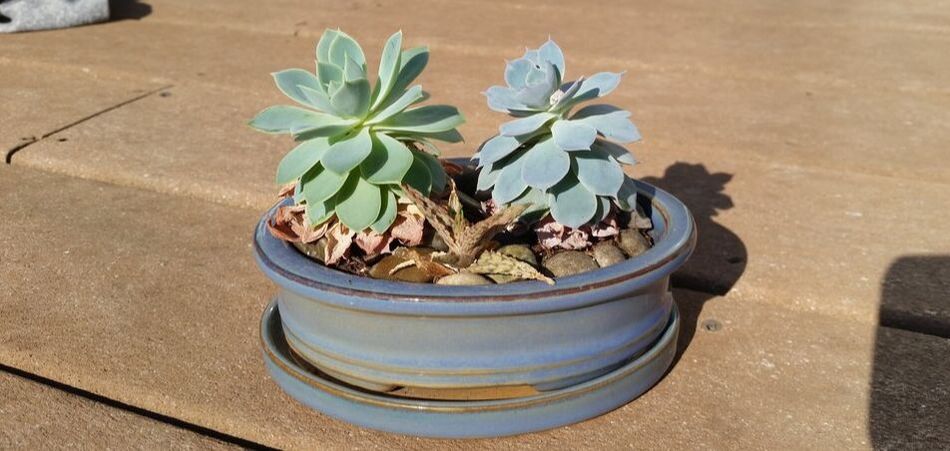 The first thing that you'll want to do is remove any stones that are surrounding your plants. Make sure to save these so that you can put them back in your arrangement when you are done. 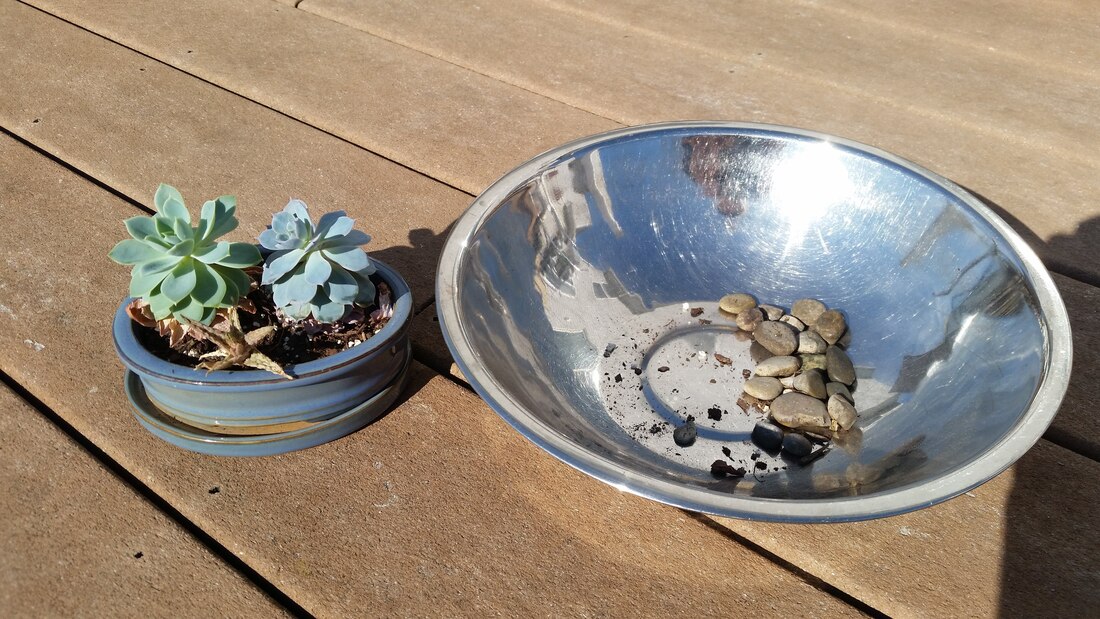 Then you can remove the plants that need to be pruned. Sometimes, this is only one plant, but with this arrangement I'm going to prune both of the main plants, so it's easier to just remove everything for the pot and dump it into my bowl. 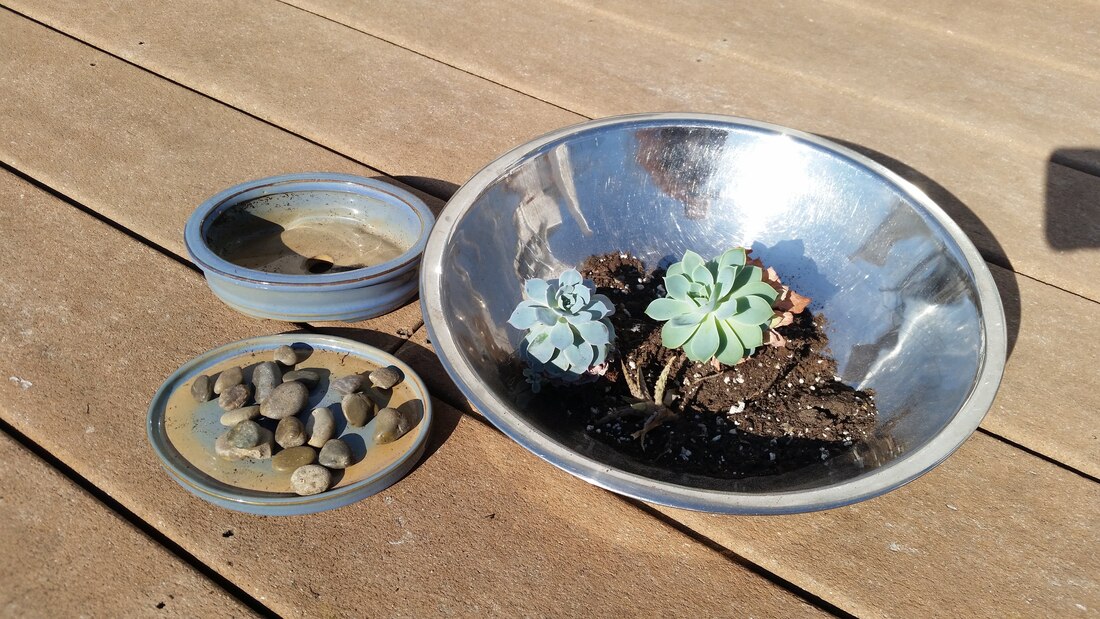 Next, you're going to remove any dead leaves. These are natural and don't mean that your plant is sick. But, they don't look very nice. Once you remove them, you can throw them away.
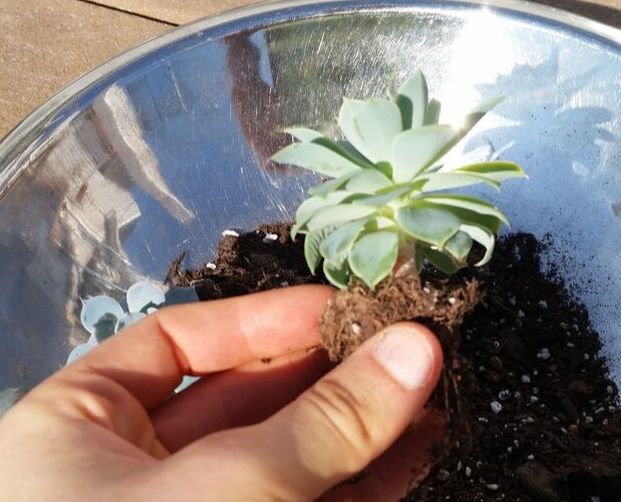
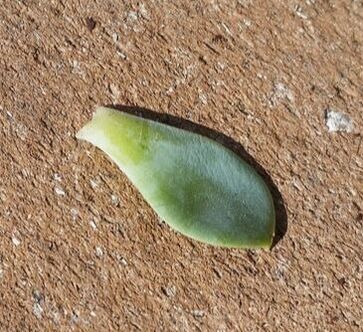
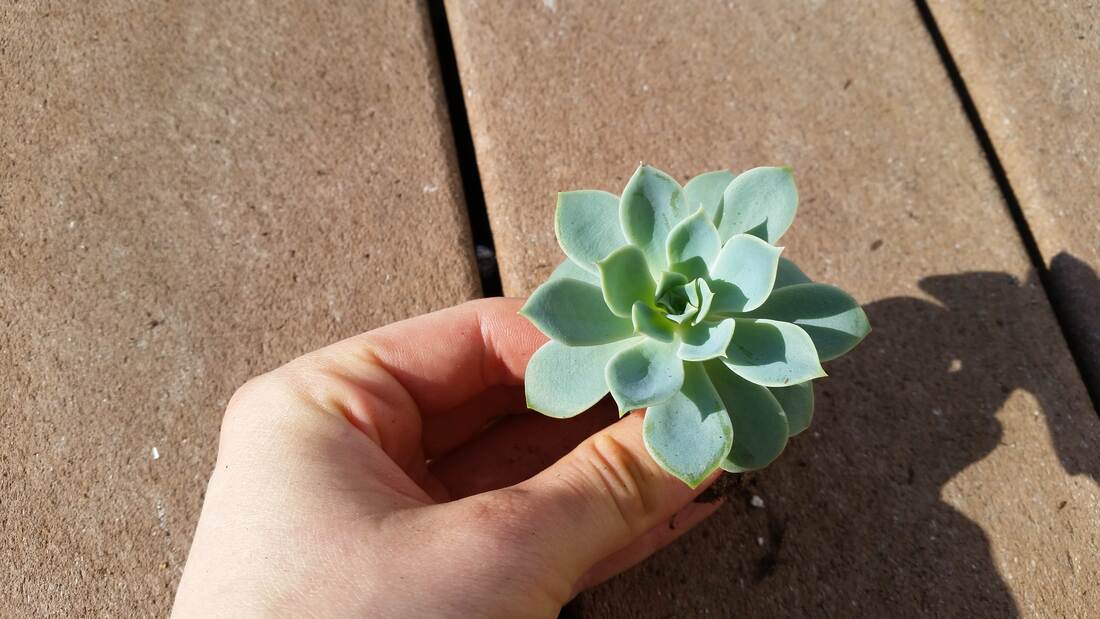
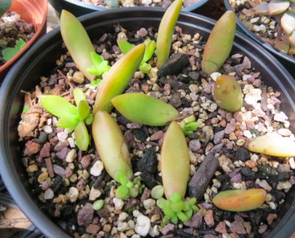
After you remove the dead leaves, your plant still might look at little stretched out. You can continue to remove leaves until you have just the top, "tight" part of the plant. Since these leaves are alive, they will be harder to separate from the stem and you'll notice that if you yank, you may only get part of the leaf. What works best for me to grab near where the leaf meets the stem and gentle wiggle or twist it until it comes free. These leaves can be used for propagation, or growing baby succulents. If you're interested in learning how to propagate, then save all of your leaves and stay tuned for my next blog post!
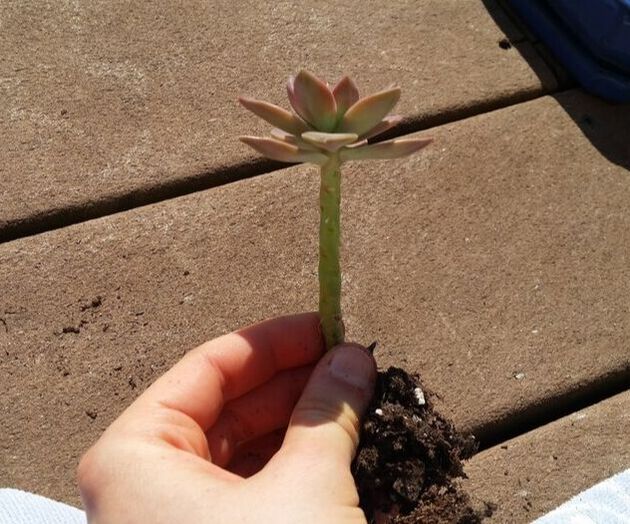
Once you've removed all the leaves, you may notice that your plant's stem is pretty long, and it won't fit back in your pot. This is when you need to behead your plant. Yep, you guessed it, you cut off the top of your succulent. With most other plants, this would mean certain death. But, succulents are super hardy and will re-grow roots once re-planted. Just make sure to give your arrangement a week or so to re-adjust before you water it. 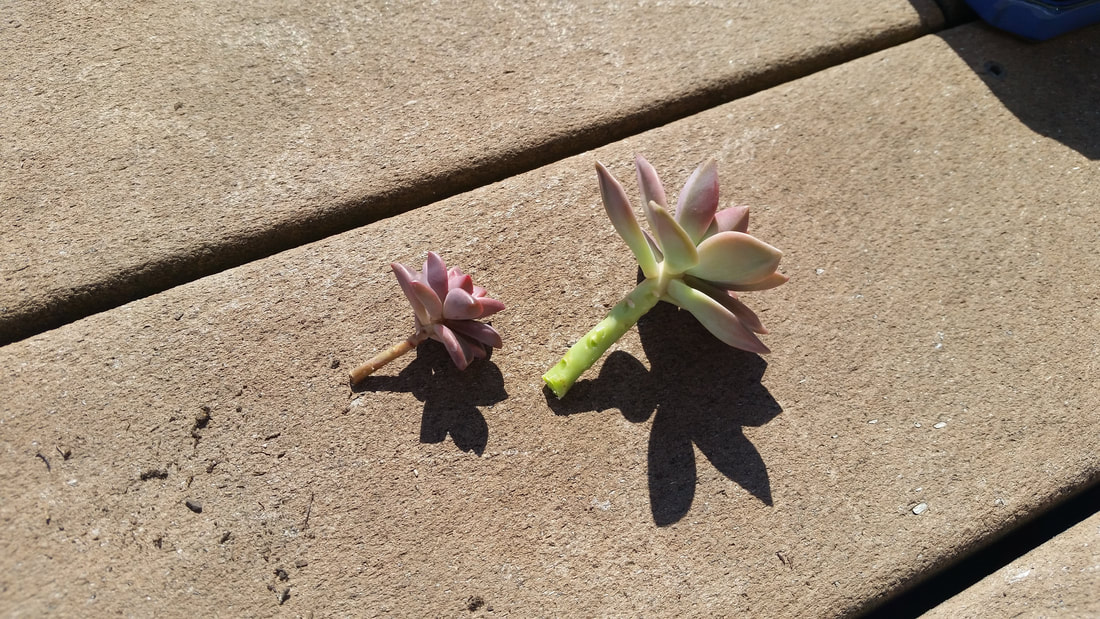 Now that your plants are the right size, you can put your arrangement back together again! Notice how much better it looks! 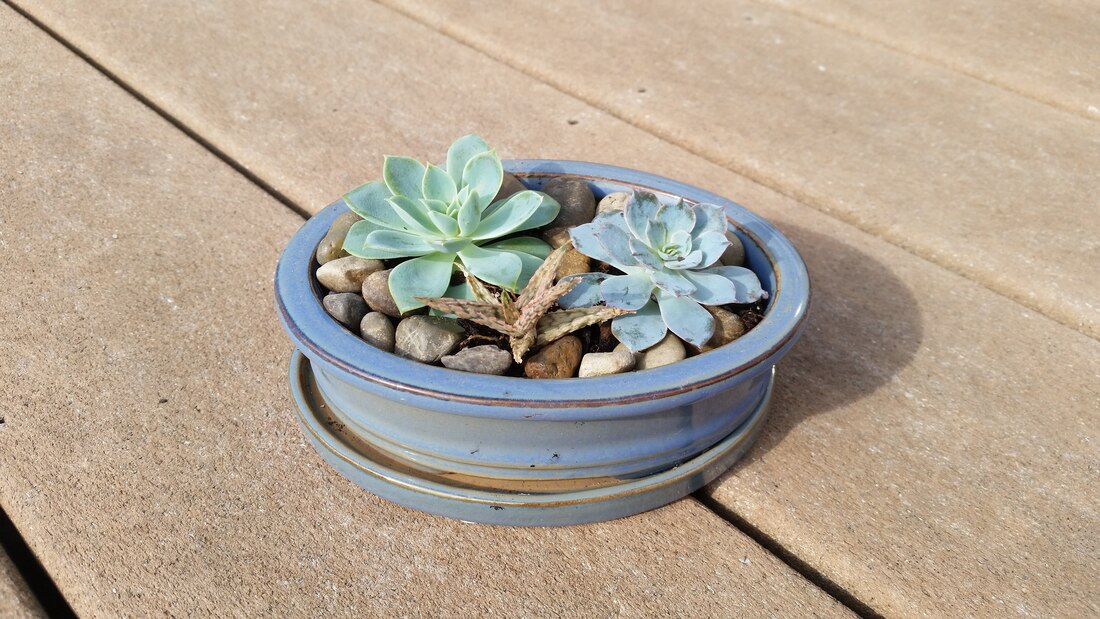 Now, pruning every arrangement is slightly different. Sometimes you will only need to prune one plant. Sometimes you will need to trim off the ends of a trailing plant, remove offshoots, cut away other plants that have grown to large, or give small plants time to regrow. Take a look at some more of my arrangements to see how I pruned them. If you realize your arrangement needs a replacement plant, or if you'd like me to prune your arrangement, I'd be happy to help restore your living art. You can email me or use my contact page.
Happy pruning and may summer begin!
0 Comments
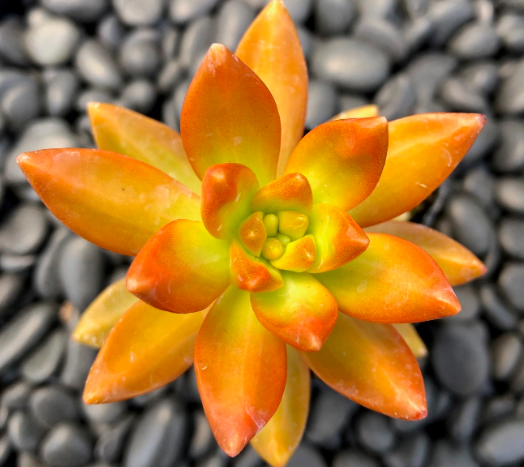
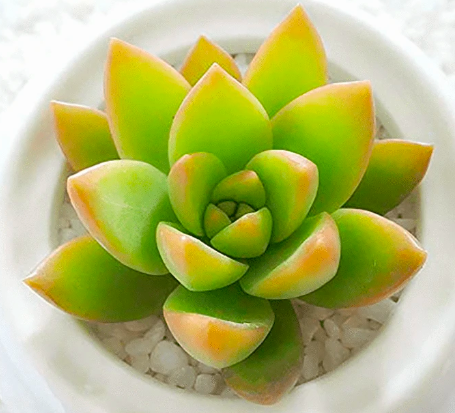
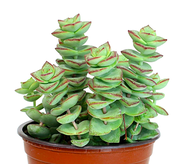
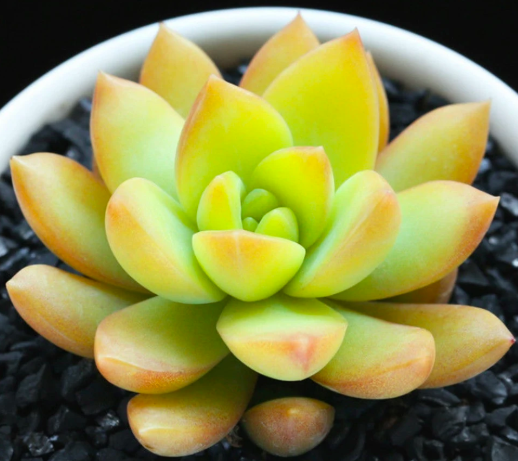 Common Name: Golden Glow Scientific Name: Sedum adolphii Variety: Sedum
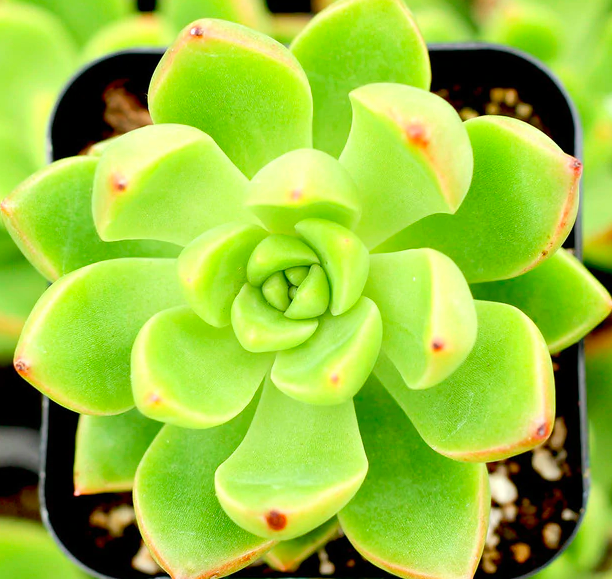
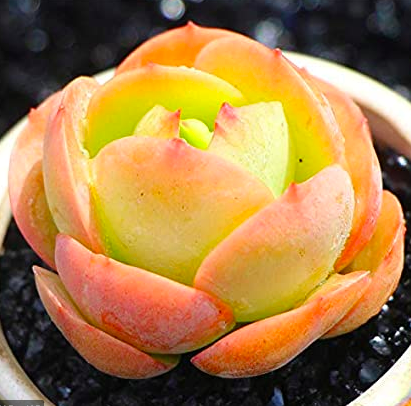
Megan’s Thoughts: Golden Glow is my go-to succulent for any time I want to add a little orange or yellow to an arrangement. I will often pair one with an echeveria ‘Perle von Nurnberg’ and a green plant like and aloe or jade. I also love that these plants propagate quickly, so I usually have a few babies that I can add to a small arrangement. One thing I learned while researching this plant is that there are actually other subcategories of Sedum adolphii. The one I chose to highlight is ‘Golden Glow” but there is a deeper red variety called “Firestorm” and one with a light green hue called “Lime Gold.” Take a look below to see the differences!
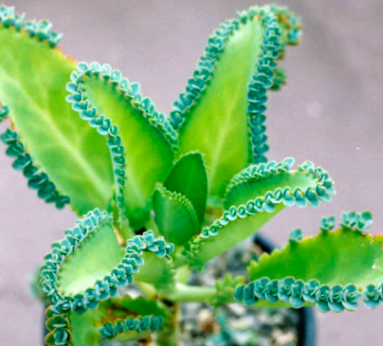
Last month I posted my first blog on succulent varieties. As I was doing research, I quickly realized that all of the varieties I wanted to talk about simply wouldn't fit into one post. So, here's round 2! Even with a second post, I won't be cover every succulent variety. But these, along with the varieties in my last post, should give you a good picture of how diverse and amazing succulents are! 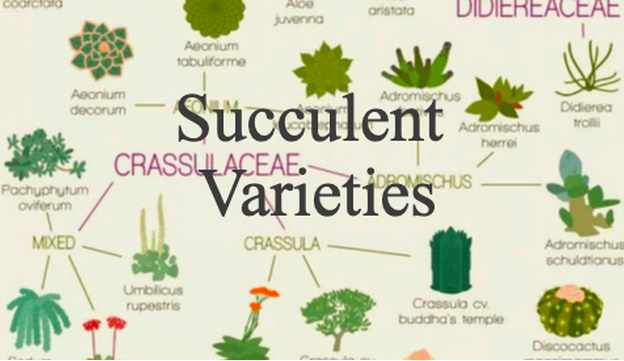 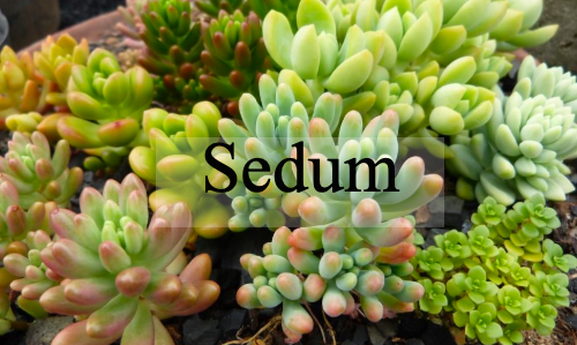 See-dumh Sedums embody what it means to be a succulent. Many of them have thick, fleshy leaves and come in colorful pastels. Sedums typically aren't tall succulents. Instead, they like to grow low to the ground in clumps with multiple rosettes or "heads" attached to one stem. You can separate one of these heads and replant it, starting a new clump. Sedums tend to have delicate leaves, and like to be left alone. But, if you do happen to knock a few leaves off, they will likely start to grow baby succulents! There are also many Sedums that are cold-hardy, meaning they can thrive even in temperatures below freezing. These sedums are sometime called "stonecrop." Stonecrop sedums, like the ones in the picture below, are typically smaller than non-frost tolerate sedums, but they come in all colors and shapes. They grow low to the ground, creating a kind of carpet. Because of this, they are used in landscaping, even in Michigan! 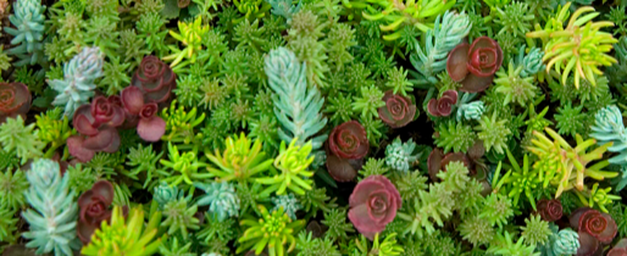 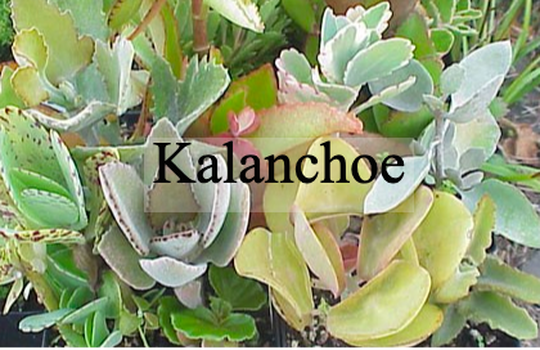 Ka-luhn-ko-ee Kalanchoes are a lesser-know family, but there are a few famous succulents in this variety. Probably the most well- know is Kalanchoe thyrsifora or 'Flapjacks.' This plant is one of my favorite succulents because of it's unique shape and bright red edges. 'Panda Plant' is also a famous kalanchoe and one of the few succulents with fuzzy leaves! Kalanchoes come in many colors, some even gold or white. They are usually taller plants, and have flat, paddle-like leaves. Some kalanchoes, like 'Mother of Thousands,' grow tiny plants on the edges of their leaves. When these babies are large enough, they can be separated and grow on their own!
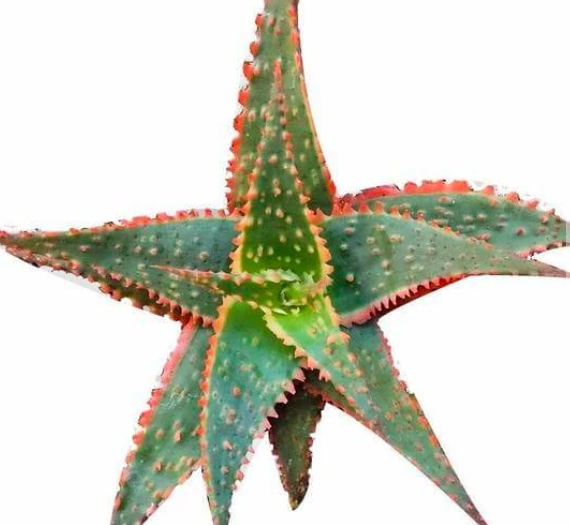
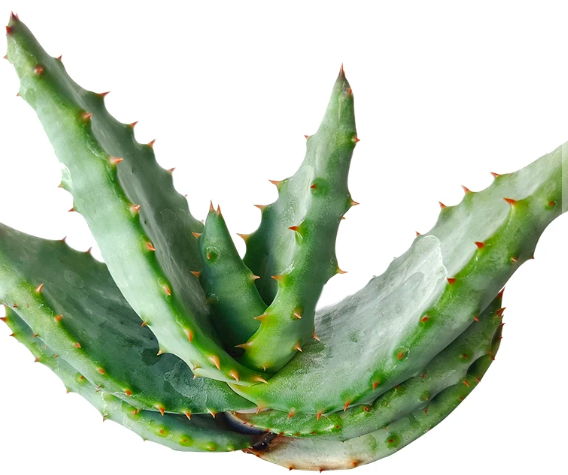
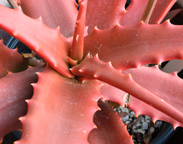
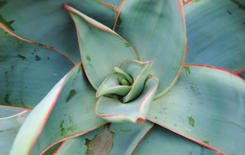
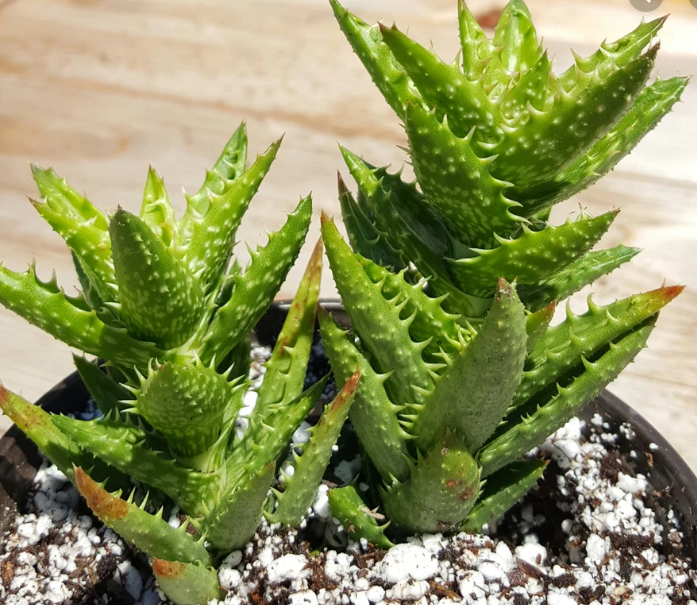
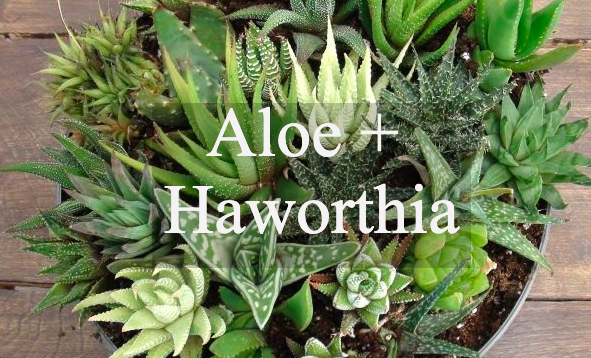 A-low + Ha-wur-thee-uh Aloes and Haworthias are very similar to each other, which is why I included them in the same section. Both tend to be shades of green and have triangular leaves that grow in star-like shapes. They are low-light succulent and hard to kill. They also both reproduce through off-shoots, baby plants which grow connected to the mother plant. However, there are some notable differences. Haworthias are usually smaller than aloes and can have a more "squatty" shape. Also, the flowers of an aloe are colorful, while a haworthia's flowers are small and white. The most definite way to tell them apart is to look for tiny "teeth" along the edge of the leaves. If the plant has these tiny ridges, it's an aloe. If not, you're looking at a haworthia.
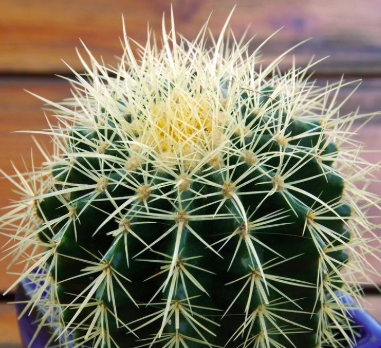
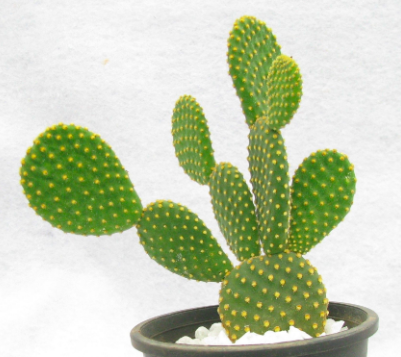
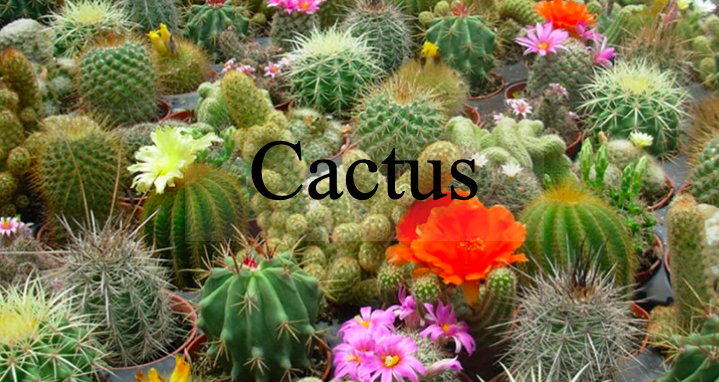 Kak-tuhs Many people think of cacti as separate from succulents. But, the truth is, cacti are just a specific kind of succulent. Like other succulents, cacti can be a variety of shapes and sizes. But, what they all have in common are spines, or, more specifically, areoles (the areas where flowers or spines grow out the cactus). However, not all cacti are dangerous to touch. Some have large areas with no spines, and some are covered with a soft, cottony, layer. Still, it's a good idea to get more information before you decide to pet your cactus. Some will give you miniscule needles that you'll be picking out of you hands for days! Trust me, I know from experience :)
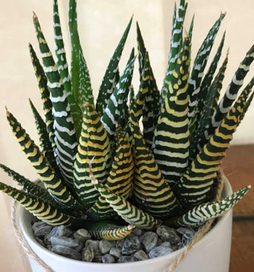
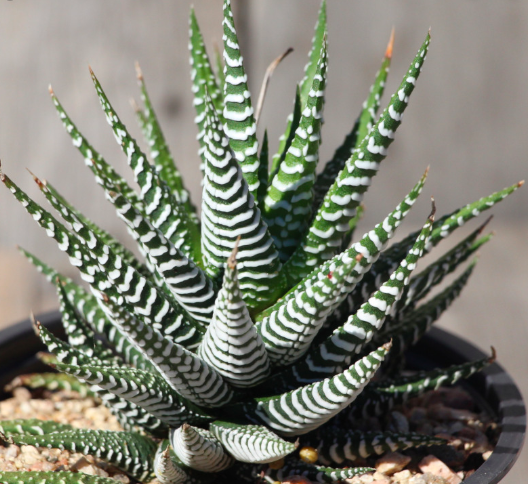 Common Name: Zebra Plant, Zebra Haworthia Scientific Name: Haworthia attenuata, Haworthiopsis attenuata
Common Problems:
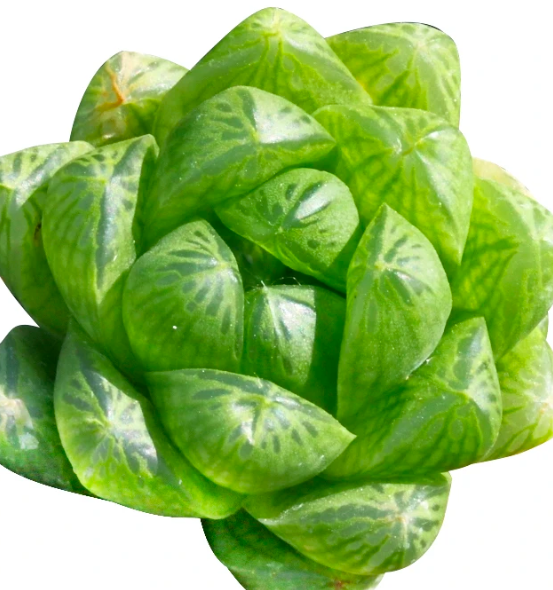
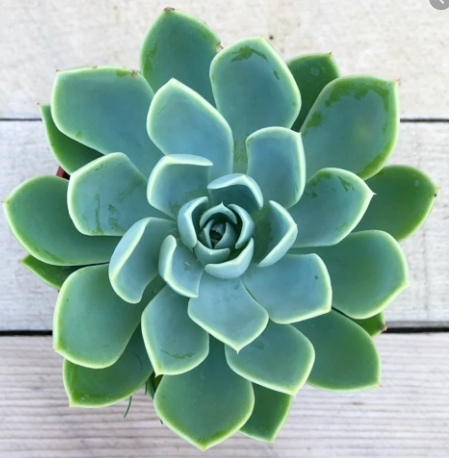
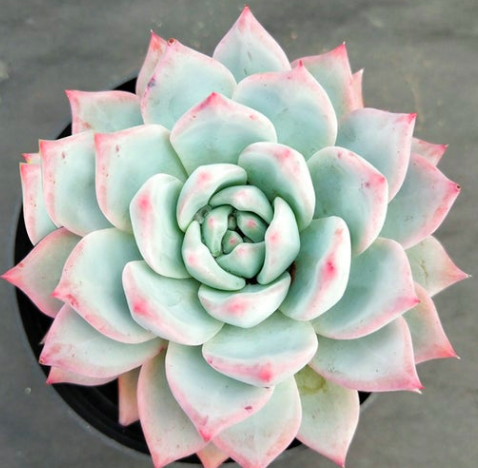
Like my aloes, I have noticed that exposing these plants to extremely bright sunlight causes them to turn a rusty orange. So, try to avoid putting a zebra plant in direct sunlight. Save that precious space for you more sun-loving succulents! Megan’s Thoughts: I like that this succulent has an interesting shape, but isn’t very tall. Most short plants are sedums (like Burro’s Tail) or echeverias (like PerIe Von Nurnberg) which have similar shapes. Adding a zebra plant changes things up, and makes the arrangement more interesting. I also love the white stripes that give them their name, and which you don’t find on many other plants. To top all of this, zebra plants are one of the few kinds of succulents that thrive in indirect sunlight, which means they can be placed in the middle of a room, away from a window. Unfortunately for me, these plants can be hard to find at my supplier. So, whenever I see one, I snatch it up! If you’ve been looking at my “Succulent of the Month” posts, you may have noticed that I include the name of the plant’s “variety” in its description. Because I’ve done a few of these posts now, I thought that I would be helpful to give you all a better understanding of what this means. 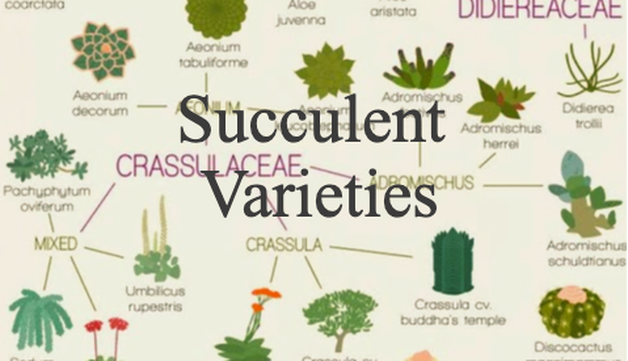 One thing that is so amazing about succulents is their diversity. Within the name “succulent” there are hundreds of different kinds of plants of all color, shapes, textures, and sizes. Succulent varieties help us to organize all of these plants into smaller groups so that we can understand them better. Knowing a plant’s type will help tell you what shape that plant will have, how large it will be, common colors and how it reproduces. They are also just fun to learn about! There are many succulent varieties so I’m not going to cover them all. But, over the course of this post and the next, I plan on showing you some of the major ones and telling you a little bit about them. Enjoy! 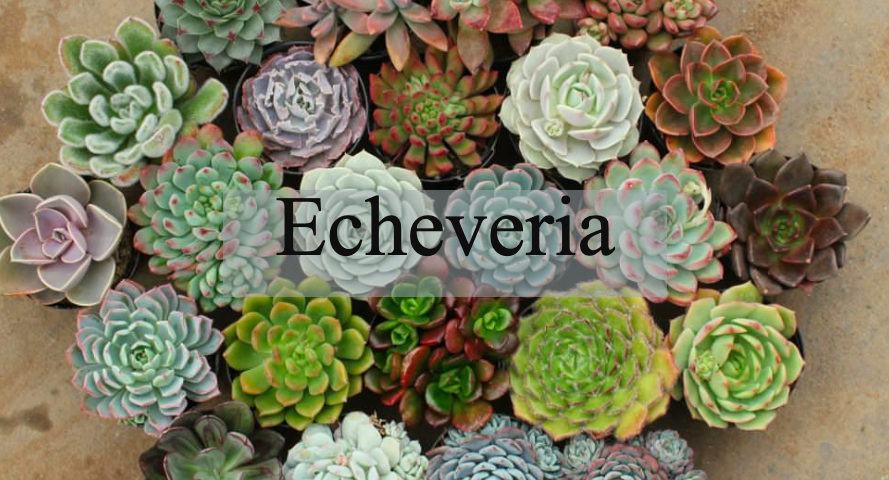 eh·kuh·veh·ree·uh Echeverias are probably the most popular variety and what most people picture when they hear the word "succulent." They are every color of the rainbow even white (echeveria 'Lola') and black (echeveria 'Black Prince'). Echeverias all share a "rosette" or flower-like shape with fleshy leaves and reproduce by propagation (leaves which when removed grow baby plants). They are typically short plants and can get up to a few feet in diameter. However, most echeverias that you will find will be about the size of your palm. Echeverias are a sun-loving variety and will turn very colorful if you give them direct sunlight. However, if they don't get enough light they will stretch and lose their beautiful shape.
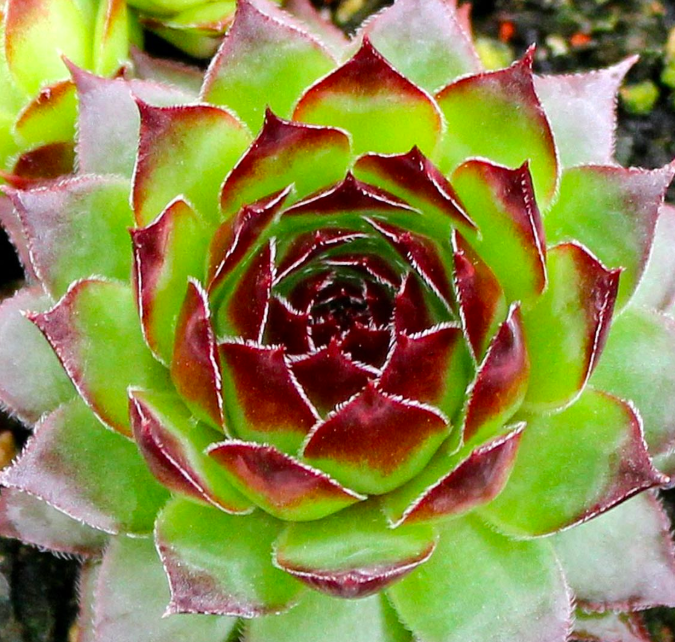
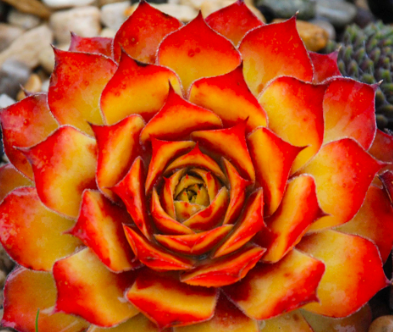
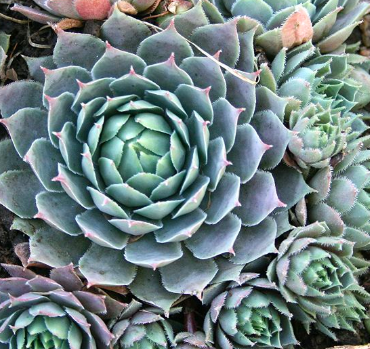
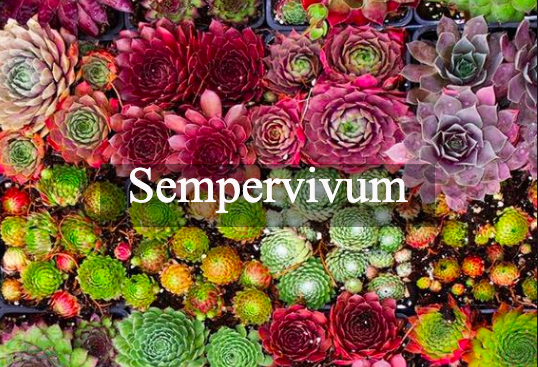 sem-per-vahy-vuhm Sempervivums are very similar to echeverias, and the two are often mixed up. The main difference is that sempervivums have thinner leaves and usually tighter rosettes. Sempervivums also tend to have more intense bold colors while echeverias are often pastels. They are also cold-hardy, which means that they can thrive outside all year round, even in Michigan! Sempervivum are sometimes called "Hens and Chicks" because the reproduced by off-shoots, baby plants that grow beside the mother.
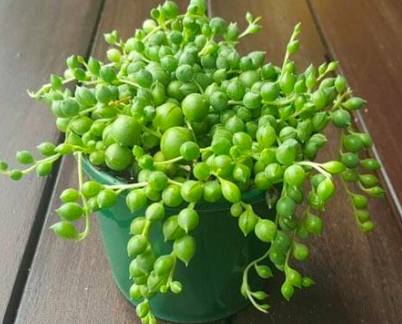
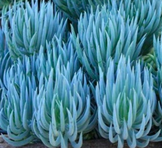
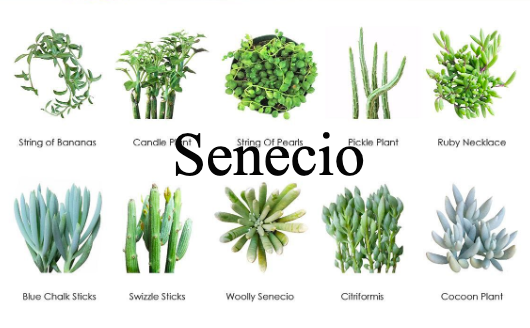 suh·nee·see·ow The Senecio variety is a weird one. There doesn't seem to be a main element that they have in common, although some of the individual members are definitely similar. This is because within the Senecio variety, there are other groupings. For example, 'String of Pearls' and 'String of Bananas' are trailing Senecios while 'Blue Chalk Sticks' are ground cover Senecio. All Senecios are shades or silver, blue or green and have small flowers.
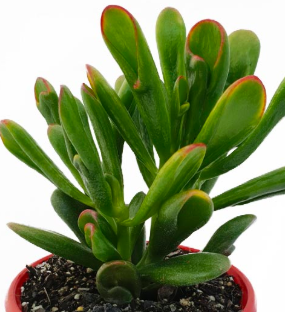
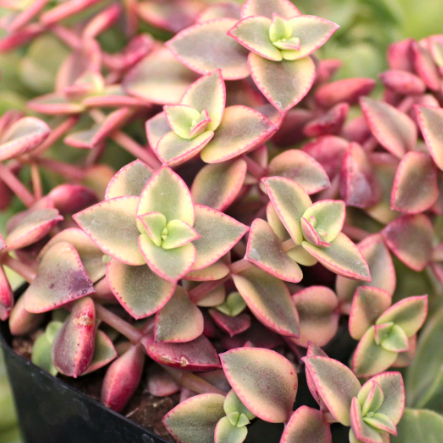
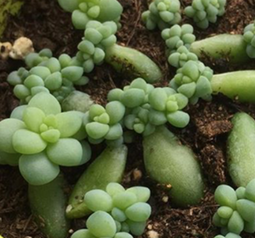
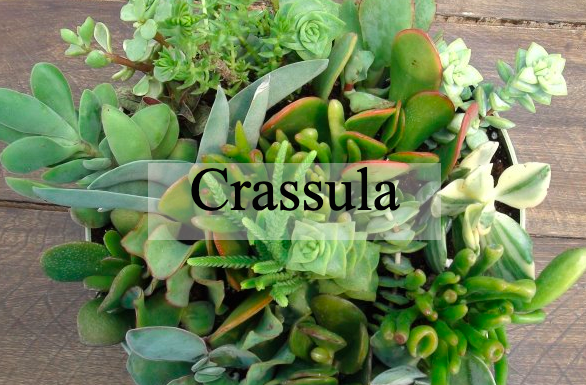 cras·su·la The Crassula variety is another one with lots of interesting shapes. One of the most famous Crassulas is the jade plant. Many Crassulas, like String of Buttons, have leaves that look like they are "stacked" on top of each other. They are mostly green with orange or white edges. I find that Crassulas make greats "fillers" in arrangements when they are clumped together or "thrillers" because of their height.
Stay tuned for my next post where I'll introduce you to a few more varieties!
Common Problems: Lack of sunlight can cause Burro’s Tail to stretch and become “leggy.” When this happens, the tails loose their beautiful compact shape. Stretching cannot be undone, but moving the plant to a sunnier spot will prevent it from happening in the future.
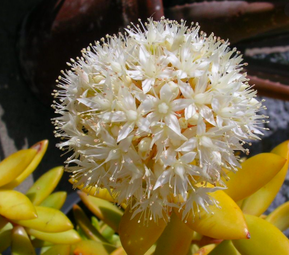
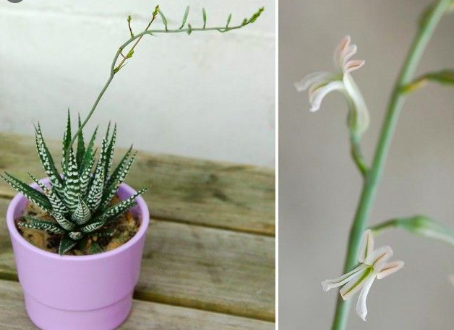
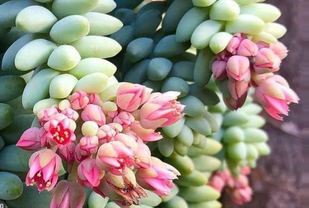
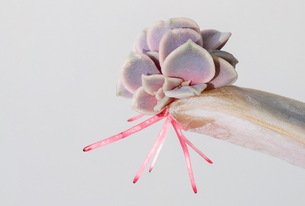
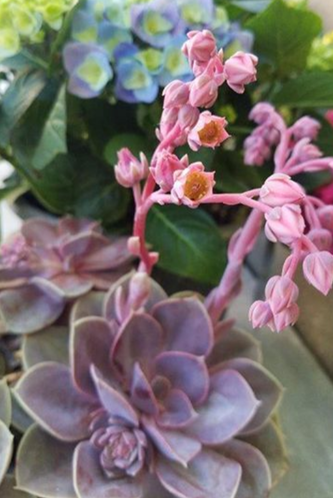
Megan’s Thoughts: I often use Burro’s Tail as a “spiller” (plant that trails over the edge of the pot) in my arrangements. The only complaint that I have about it is that it is very delicate, and so hard to transplant. Even brushing against the plant can cause leaves to fall off, leaving holes where you can see the stem. Because of this, Burro’s Tail is happiest when left alone. As promised in last month's post, here are the pictures of my blooming succulents! Most succulents flower in the spring or summer, but because these guys have been under grow lights, they feel ready right now. I always get excited when I see a flower start to grow, especially if it's on a plant that I haven't seen bloom before. This winter, I decided to take pictures of my succulents every few days in order to track their progress. The end result is an animation where you can see the plant grow and flower in a matter of seconds!  This first plant is a Haworthia, specifically Haworthia retusa. As is typical in Haworthias, it grew small white flowers on a long stalk. As you can see, the stalk grew so tall that I kept having to zoom out to keep it in the picture! It also grew quickly, as these pictures were taken over about a two week period. Compared with some of the other flowers, these blooms seem a little boring. Sometimes I just want to say, "Really? You grew a giant stalk for that?" But, I still have an appreciation for these flowers, tiny as they are.   Next is one of my favorite succulents, Echeveria colorata. I love the magenta tips of this plant, and was pleasantly surprised to see the tiny leaves on the stalk follow the same pattern! I was treated again when the pink, bell shaped flowers opened up to reveal a yellow inside! This plant took longer to flower than the Haworthia, especially in the beginning stages. But, it was definitely worth the wait, and I was sad to see flowers start to shrivel. However, the other day I noticed that a new stalk was starting to grow. Yay!   In addition to several succulents, I also had one of my cacti flower! Cactus flowers are special because the usual only stay open for a day or two. This cactus grew several flowers, which opened in different rounds. So, because of their short life I wasn't able to get a picture where they were all flowering at once. But, I did get several good ones. The last one in the sequence is my favorite! 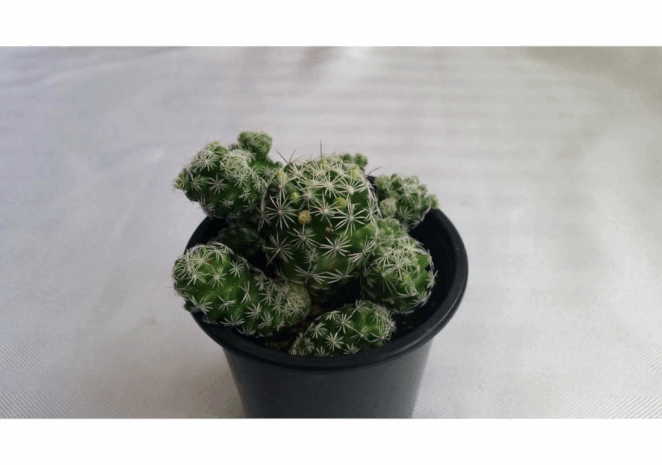  Here's another Echeveria, but this one grew two flower stalks! I thought it was interesting how the flowers seemed to "unroll" from the stalk in a neat line. I also like the bright yellow, which is so different from the rest of the plant. 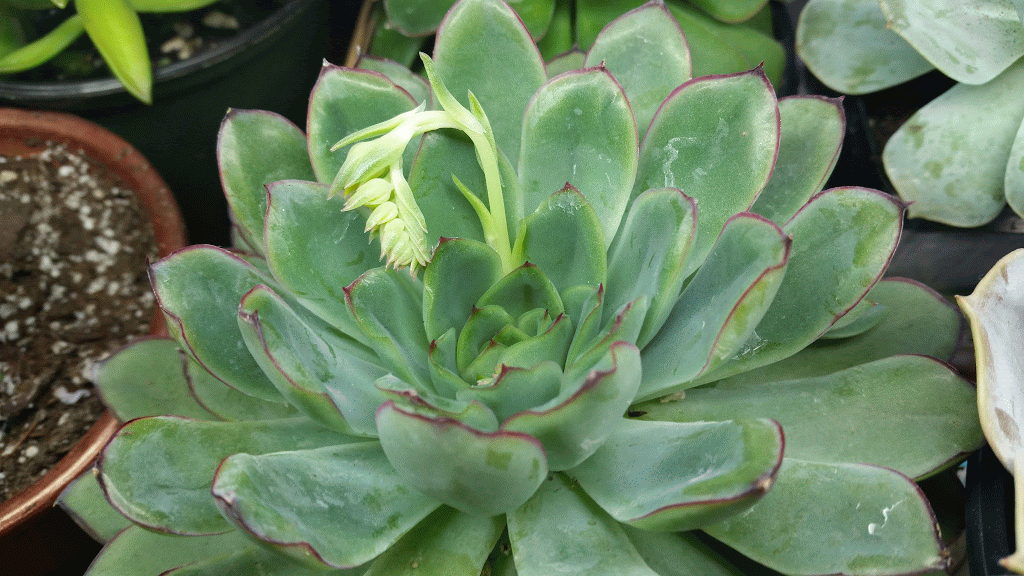  I actually didn't realize this echeveria was flowering until it was already well into the process! Even so, I managed to get some good photos. I particularly like the way the flowers are arranged at the beginning or the sequence, with one bigger one in the center and smaller blooms around it. As the flower stalk grows, they start to spread out and lose their formation. But, in exchange, we get some vivid red and yellow blooms! 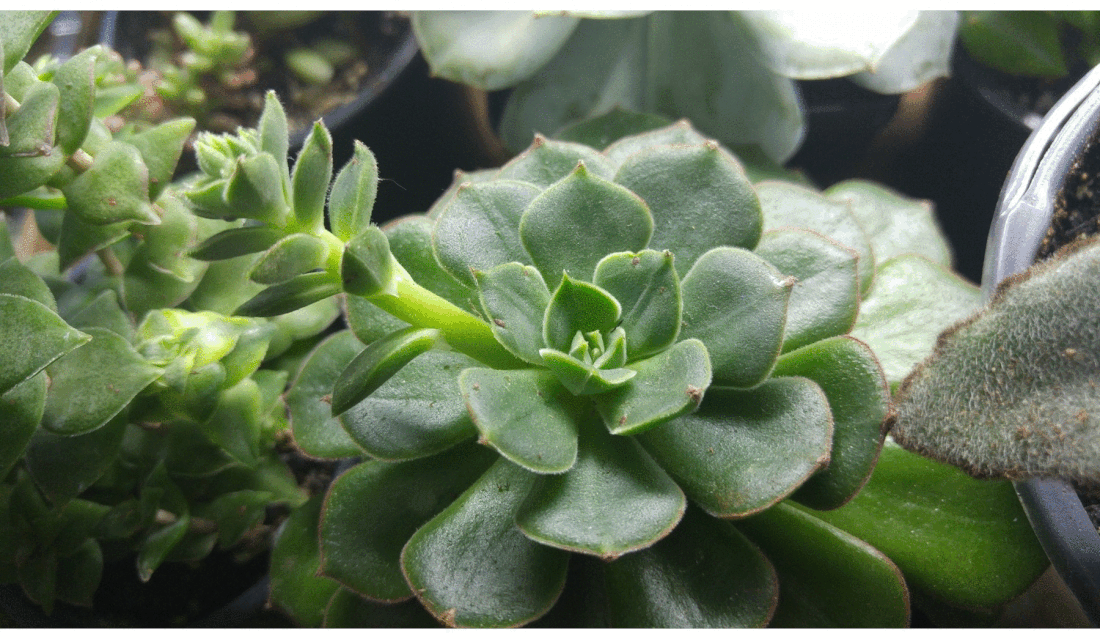  This last echeveria took a very long time to flower. I started taking pictures at about the same time as the Haworthia. But, while that flower stalk grew rapidly, this one hardly seemed to change at all! In the animation it seems quick, but that is only because I cut out many pictures. And, because this plant grew so slowly, I wasn't able to get photos of the actual flowers for this post. Instead, the last picture looks a little like the beginning pictures of the two-stalk echeveria, where the flower buds are lined up, waiting to bloom. I suppose that it will have to be a bit of a cliff-hanger. 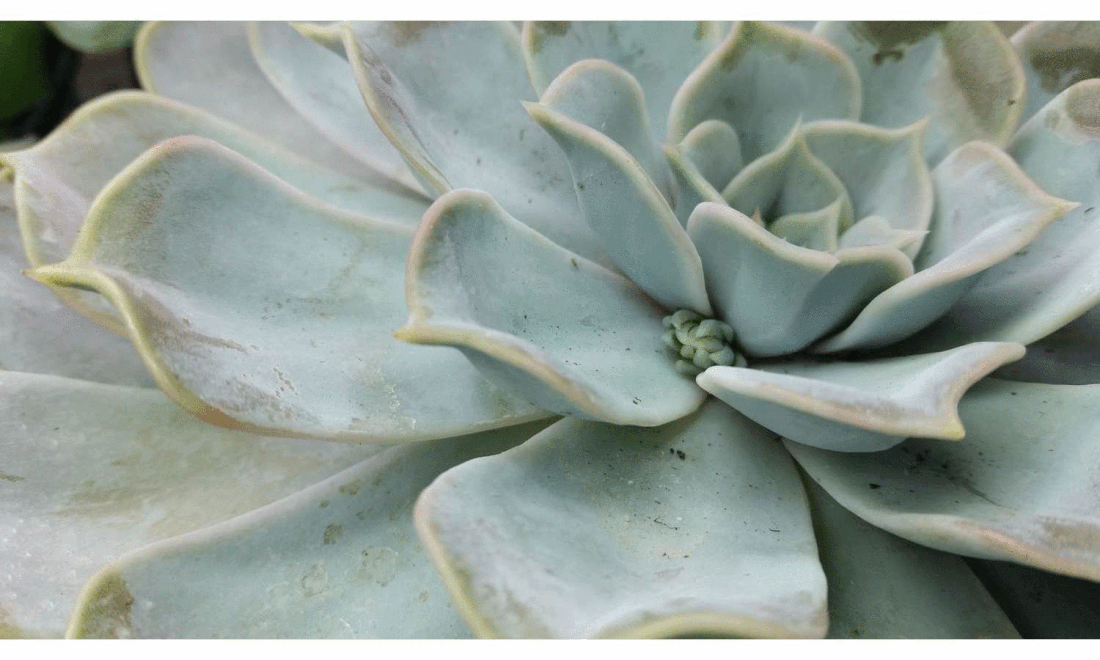 If any of you have flowering succulents, I would love to hear about it and see a picture! You can email me at [email protected] or comment on this post.
I hope that you enjoyed these animations! 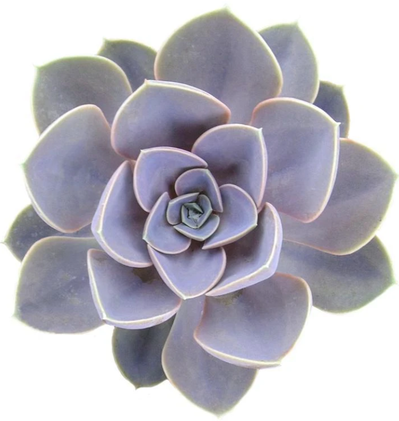 Common Name: Perle von Nurnberg, Duchess of Nuremberg Scientific Name: Echeveria ‘Perle von Nürnberg’
Common Problems: Even more than most succulents, Perle von Nurnberg can easily die from root rot (caused by over-watering). Overly damp soil can also cause fungus. In both of these cases, the leaves will fall off the plant and the stem will be soft or even mushy. To avoid this, make sure that you are letting the soil dry completely between watering.
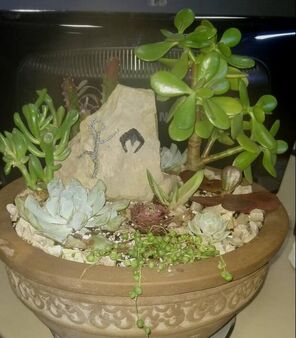
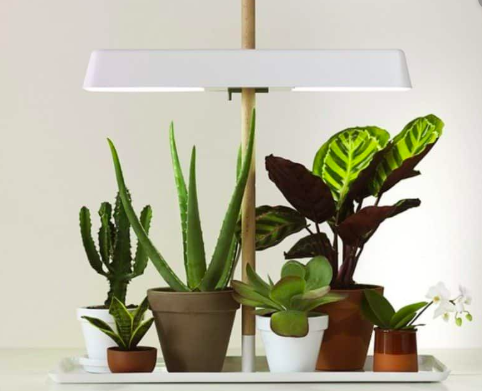
Megan’s Thoughts: I love the vibrant color of these echeverias, and use them often in my arrangements. In fact, I sometimes have to force myself not to add a Perle von Nurnberg, and instead try something else. If I didn’t, there’d probably be one in just about everything I made. Besides their color, I love how the curve and point of their leaves fits together to make a beautiful pattern. They do need a lot of light to be happy, but in my opinion, they’re worth it! During this time of the year, especially in Michigan, things can start to get a little gloomy. The holidays are over, we’re back into our routines, and a sunny day is rare. You may have noticed that your plants are looking a bit sad as well. Like us humans, succulents love the light, and a Michigan winter can be tough. But while we might just have to wait until spring, there is a way to get your plants a little extra sunshine.  When it comes to grow lights, there are a lot of questions. Many people have heard of the idea of a grow light or grow lamp, but it can be difficult to figure out what exactly they are or why some people use them. Before I answer any other questions, it’s important for you to know that, in most cases, your plants do not need a grow light. As long as they are exposed to some sunlight, even indirectly, they should survive. But, there are enough benefits to having your plants under grow lights that it is worth considering. As I said before, most succulents don’t require a grow light as long as they are near a window. However, if you have an arrangement that you want to enjoy in a basement bedroom or windowless office, a grow light could be a great option. This first use of a grow light is what motivated my climbing gym, Scrapyard Climbing Collective, to buy one. A few months ago I made a unique arrangement for Scrapyard as a gift. I specifically choose low-light plants for this arrangement, knowing that it would be in a location that gets very little light. The arrangement has actually been holding up remarkably well, but the dark winter combined with a nearly windowless room was too much. I was very grateful when Scrapyard’s owner recognized this and decided to purchase a grow light! Now the plant has what it needs to survive, and everyone that visits is able to enjoy it.
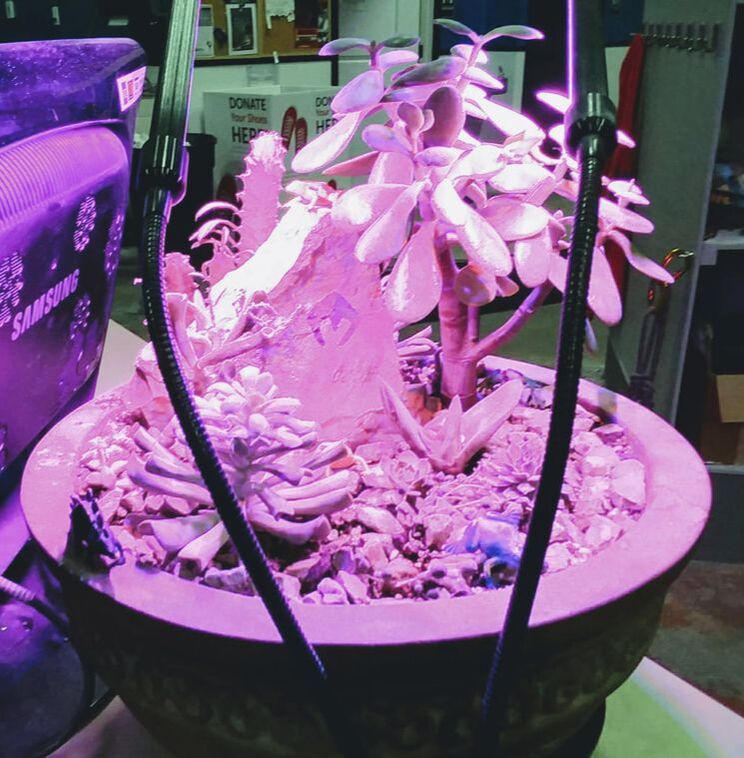
If your succulent already has the light it needs to survive, a grow light can help it thrive! This is why I decided to purchase grow lights. I knew that my succulents would be able to live through the winter, but I wanted to be able to sell (and enjoy myself) happy, thriving plants all year long. Putting my plants under lights prevents stretching and causes the plants to be more colorful. To see what I mean, take a look at the two pictures below. These pictures show the same succulent arrangement during different time of the year. Both plants are perfectly healthy, but you'll notice that the one on the right is more colorful.
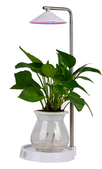
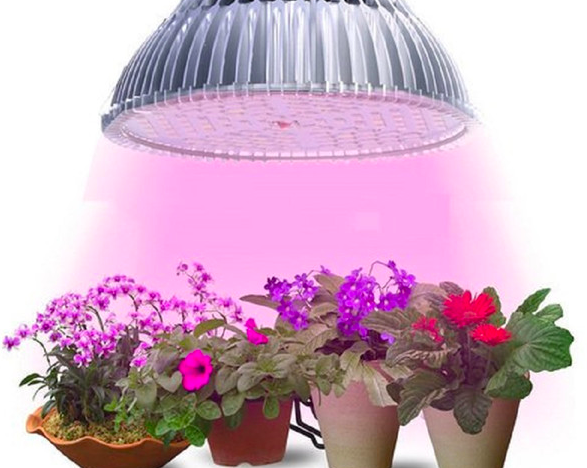
oGiving your plants extra light can also cause them to flower. Flowering normally happens in the spring or summer, but grow lights can also trigger it during the winter. Because they are under lights, some of my succulents are in the process of flowering right now! If you want to see their blooms, just wait a few weeks for my February post. This answers the “why” of grow lights, so now it’s time for the “what.” What counts as a grow light? What kinds of grow lights are there? What is the best grow light for me? A “grow light” can be anything that produces useable light for plants. Typically, plants use the blue/red parts of the spectrum, as you see in the picture below. They don’t use very much of the yellow/green parts, because this is what they reflect, making them look green to our eyes.  This is why some of the lights you have in your house, for example, incandescents, don’t make very good grow lights. Incandescents also produce a lot of heat, which can be dangerous for your plants. So, what can you use? There are two main options for grow lights: Fluorescents and LEDs. There are a lot of different factors as to why you would choose each one and several kinds of lights within these categories. But, in this post, we’re just covering the basics. Fluorescents produce cool, white light, giving your plants the full spectrum. They are often in tube-like bulbs, but you can get compact fluorescents as well. Also, fluorescents have a high output, meaning that they’re bright and can get warm, although not as warm as incandescents. Unfortunately, because of this, they use more electricity than LEDs and can cost more upfront, depending on what kind you buy. 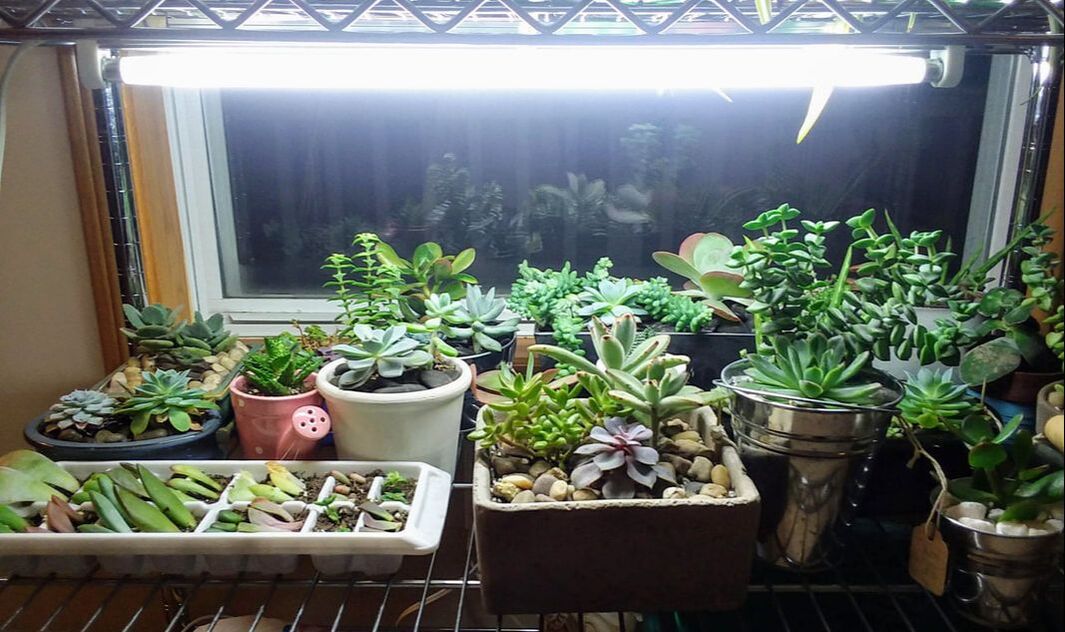 My grow light set up In contrast, LEDs produce a purplish light, targeting just the parts of the spectrum that your plant needs. These colors can also help trigger your plant to flower. LEDs have a lower output, which means that they can use less electricity than fluorescents. However, this also means that they don’t provide as much light, so your plants probably won’t be as colorful. In addition, some people choose not to buy LEDs because their strange color can be hard to look at. 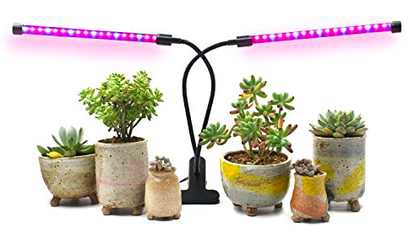 As you’ll notice from the pictures at the beginning of my post, I choose to go with fluorescents while Scrapyard bought LEDs. Our lights also differ in their structure. Mine are tubes that attach to the underside of my plant racks, and Scrapyard has a single, clip-on grow light. There are many other lamp styles as well. You can also choose to buy just the grow light bulb, and then use it in any lamp you already have.
I know that this has been kind of a lot of information, but I hope that, after reading this, you have a better understanding of grow lights. Remember that grow lights aren’t necessary or even recommended. But, if any of you do decide to purchase one, I would love to hear about it! You can comment on this post, or send a picture to [email protected]. 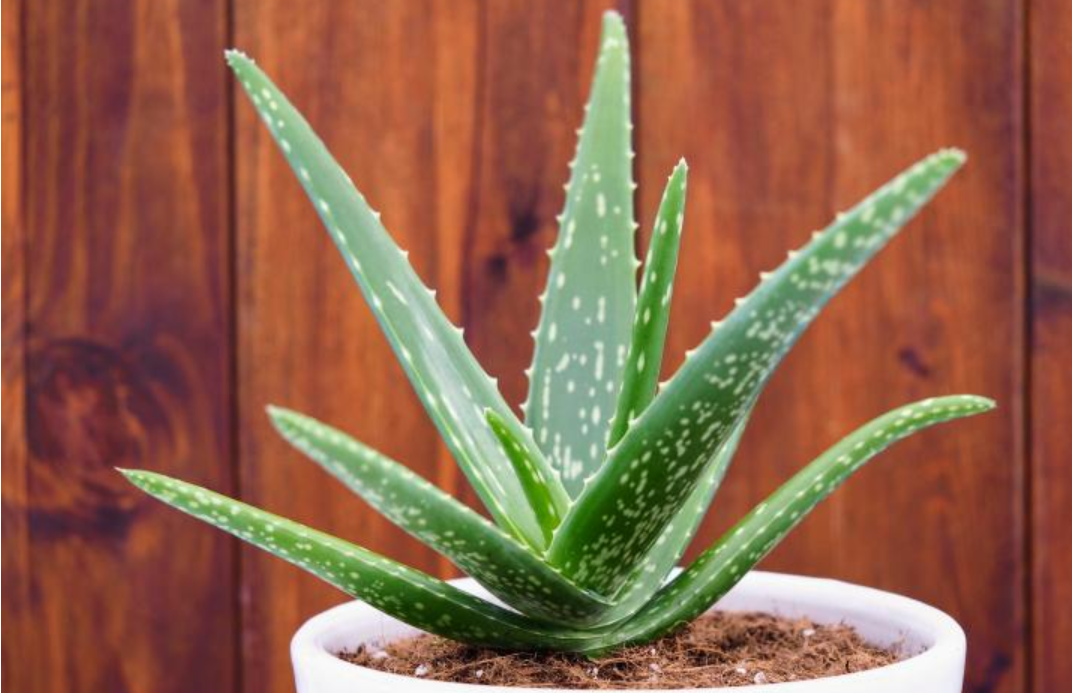 Common Name: Aloe vera or True Aloe Scientific Name: Aloe vera or Aloe barbadensis miller Family: Aloe Flowers: Aloe vera will flower, but only when it reaches maturity, at about 4 or 5 years of age. When it does flower, it’s blooms are orange and attached to a stalk that grows out of the center of the plant. Reproduction: Aloe vera reproduces by pups or offshoots, small plants which grow attached to the mother plant. They can be separated and moved to another pot, where they will grow on their own. Common problems: Aloe vera is a very hardy succulent, but watch out for root-rot. Over watering can quickly lead to brown, mushy leaves and death. I have also noticed that some of my Aloe veras that were exposed to very bright sunlight turned and orangey-brown. They were still healthy, but didn’t look as good. Placing them somewhere that got a little less light returned them to their natural green. Megan’s Thoughts: Aloe vera is one of the most well-known succulents and is sold at many garden centers or nurseries. Many people know about it because it has medicinal properties, and so is used in skin care products. However, most people do not know that “aloe” is actually the name of a plant family, not just one plant. Aloe vera is the most famous aloe, but there are over 500 other species. For example, Aloe Striata, Tiger Tooth Aloe, and Red Aloe. I often use Aloe Vera as a “thriller” in my arrangements. Their height and unique shape make the piece interesting and exciting!
|
Megan KamperHi! I am the creator of Thrive Living Art! I love to learn about how to help plants thrive, and then combine that knowledge with my creativity to make living art! On my blog, you'll learn more about taking care of succulents and other plants. You'll also find out what Thrive is up to, and where I'll be selling my art next! 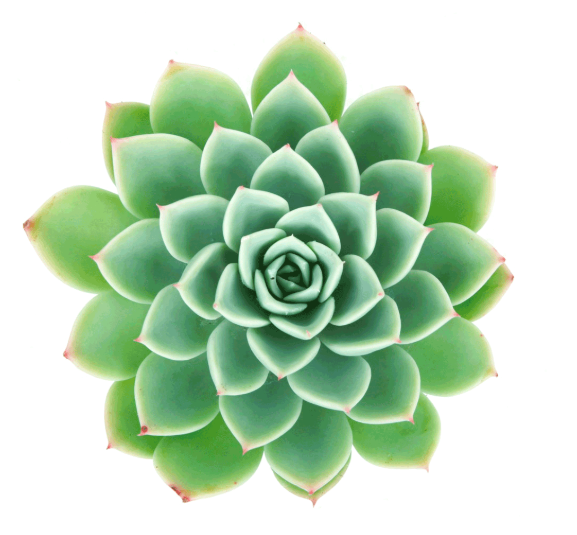
Archives
December 2020
Are you struggling to keep your plants alive?Get some advice!
|